Use this routine to attach image files to selected products, web collections, and product families in STORIS. This way, if you have image files of your products/collections/families, whether on a disc provided by your manufacturer or created in-house, you can attach the image files to their respective product/web collection/product family records in STORIS. You can attach one or multiple images to products, families, and web collections.
Once a product image has been attached, you can quickly display a picture of the product on your computer screen at any Product field with a camera icon in STORIS. STORIS displays the images using the local PC's default viewing application for the .jpg extension. The images you attach to products, product families, and web collections can be viewed on the web via eSTORIS (you must first replicate the image database onto your web server). Note that you can attach multiple images to a single product, product family, or web collection, but you can view only the primary image via the Product field in STORIS. You can view multiple images via this process or via the web.
This process is also where images are pulled from when they are rendered onto forms using Enhanced Laser Forms.
![]() The
Update Product Images process is different from the File
Attachment feature. The Update Product Images process allows you to
view and manipulate large numbers of image files, whereas the File Attachment
feature allows you attach many different kinds of files to STORIS records,
but lacks the file management features of the Update Product Images process.
The
Update Product Images process is different from the File
Attachment feature. The Update Product Images process allows you to
view and manipulate large numbers of image files, whereas the File Attachment
feature allows you attach many different kinds of files to STORIS records,
but lacks the file management features of the Update Product Images process.
When you select Update Product Images from the menu, you must enter security information on the User Authentication window. The Login ID, Host Name, and Account automatically fill in, but you must enter the Password each time you log in to one of these processes. The Login ID and Password are the operating system User ID (aka O/S Login) and Password you use to initially log in to the server.
The Update Product Images screen has many file management functions to help you import images and later maintain the images. The main screen is divided into the following panes:
top pane - Contains management parameters and options used to manipulate the content of the product/web collection list in the left pane, as well as other options such as the Image Editor.
left pane - Contains the STORIS product/web collection grid in the top section. You can arrange this list in a variety of ways. The bottom section displays the image view below the product/web collection grid. The image view shows all available images for the selected product or web collection.
right pane - Used to search for, maintain, and attach images. Consists of two sections and the following tabs:
Product Image Explorer - The top section is a Windows® Explorer-type tree structure that displays the contents of the product image folder on the local PC. The bottom pane displays all the images in the selected folder.
File Explorer - The top section shows the Windows® Explorer file manager, which you can use to search for images. The bottom section displays all the images in the selected folder.
Your organization may have thousands of images to import into STORIS. The Update Product Images (Image Wizard) helps you import them quickly and accurately into the STORIS Image Repository, and also helps you maintain them later on. You can copy your images into a folder on your PC and then import them into STORIS, or you can import them directly from a disc or other source. The following extensions are permitted: JPEG, JPG, EXIF, PNG, PNM, TIF, TIFF, PCX, TGA, BMP, PSD, PCD, GIF, WMF, EMF.
To import your images into STORIS, use the Product Image Explorer tab to locate the directory where your images reside. If any image files reside in the folder, the images display as thumbnail images below the File Explorer pane.
You can import multiple images into a folder all at once using the Bulk Import button. Once the button is clicked, a dialog box opens that asks if you would like to continue with the bulk import. Choose "Run Bulk Import" to continue; each image in the folder is then processed by Image Wizard. Note that this is possible with a minimum SCiX version 10.4.30085.4.
![]() After you import your images into STORIS, we recommend you replicate
(copy) the images in the STORIS database (also called the STORIS Image
Repository) to one or more centrally located directories, and STORIS provides
a "service" program for this purpose.
After you import your images into STORIS, we recommend you replicate
(copy) the images in the STORIS database (also called the STORIS Image
Repository) to one or more centrally located directories, and STORIS provides
a "service" program for this purpose.
With the Auto Format Image option selected in the top pane and the File Explorer tab active in the right pane, you can drag an image on top of a product or collection grid line in the left pane. When you release the mouse button, the system attaches the image to the product/collection record in the STORIS database. When you drop an image on top of a product/collection with Auto Format active, the following occurs:
The system creates three image versions based on the source image: a large image, a standard image and a thumbnail image.
If the source image is wider or higher for any of the image versions than the settings specified in the Image Wizard Settings, the system shrinks the image while maintaining the aspect ratio so that neither the height nor width is greater than the maximum size.
For the thumbnail image only, if the width or height is not at the maximum size, the system adds a white "canvas" to fill the image so it is exactly the maximum image size defined in the Image Wizard Settings.
STORIS uses only the large image. Other applications, for example eSTORIS, may use the standard and thumbnail versions.
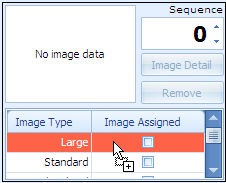
With the Manual Format Image option selected in the top pane, the product or collection selected in the left pane, and the File Explorer tab active in the right pane, you can drag an image from the File Explorer to the lower left pane on top of the Image Type, as shown below. When you release the mouse button, the system attaches the image to the product/collection record for the selected image type (Large, Standard, or Thumbnail).
After your product image files have been attached/imported into STORIS, you can then view them by clicking on the camera icon that appears next to many Product fields in STORIS. The system displays the primary image (sequence zero) associated with the selected product. When searching for image files, the system uses the following hierarchy:
The STORIS.ini file on the local PC
The Replicated Directory Path field in the Image Wizard Settings
The STORIS Image Repository on your system server
Local access is fastest. If a replication path is not specified on the local PC, the system looks next for a path to a centrally located server. Finally, if neither of the above are found, the system looks to the STORIS database for the requested image.
![]() The Product field in STORIS allows you to view images attached to
a product while eSTORIS allows you to view images attached to a web collection.
The Product field in STORIS allows you to view images attached to
a product while eSTORIS allows you to view images attached to a web collection.
When you attach multiple image files to a single product or web collection, the following is true:
Only the primary product image (assigned sequence 0) can be viewed via the Product field in STORIS.
All product images attached to the product can be viewed using the Update Product Images routine and via eSTORIS.
Image files you attach to a web collection are viewed only via the Update Product Images routine and eSTORIS.
![]()