Design Enhanced Laser Forms
Access
Sections:
User Authentication Window, Form
Management Window, Left Pane, Right
Pane
Use this feature to design and/or modify laser
printer forms you can use when printing STORIS documents. The Forms Designer
comes delivered with many laser form layouts called Standard Forms, including
forms for sales orders, purchase orders, checks, and credit card receipts.
You can use these standard forms as-is, or you can copy the layouts
and create your own custom forms from the copies.
To access an option, click on its associated tab at the top of the Forms
Designer screen. The Report Designer tab contains the screen on which
you edit forms, so you see the internal names of the actual fields on
the form. The other tabs show a generic print display of the form
(that is, no data, just the spaces occupied by the various fields and
labels on the form).
Activating the Forms Designer Via
the Control Settings Files
To print STORIS documents using a Forms Designer form, you must select
Forms Designer as your print method in the appropriate Settings file.
For example, to print sales order forms such as exchange receipts, select
Forms Designer at the Sales Order field on the Printed Documents tab of
the Point of Sale Control Settings.
Then, whenever a user prints an exchange receipt, STORIS uses the form
you specify as the default form (see the section on the Default
column).
Forms Designer flags also exist in the following Control files:
 Most regular laser print
forms are also available as STORIS Standard form templates within the
Forms Designer.
Most regular laser print
forms are also available as STORIS Standard form templates within the
Forms Designer.
If using Multi-Lingual
Processing, the language for each form is derived from the Document
Language field on the Settings tab in the Warehouse/Store
Location Settings for the warehouse or store location associated with
the form (specified in the Locations column of the Form
Management Window.
User Authentication Window
Before you can access the Enhanced Laser Forms Designer, you must enter
security information at the User Authentication window. For more information
on the User Authentication window, check with your system administrator.
Form Management Window
After you enter your user authentication information
and click OK, the Forms Management window loads, displaying the Design
Standard Forms group in the right pane. Figure 1 shows the top portion
of the screen. The left pane displays your editing options such as Copy
Form and Delete Form. Figure 2 shows the bottom portion of the left
pane, which contains your available form groups (that is, standard, label,
addendum, and insurance letters), with Design Standard Forms as the current
choice.
In Figure 1, the right (main) pane displays the available form types
for the selected form. That is, the form group you select in the
left pane determines the form types that appear in the right pane.
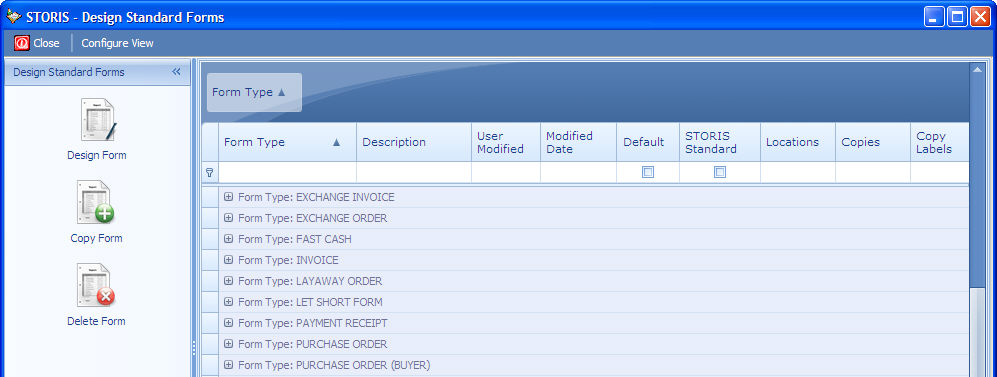
Figure 1
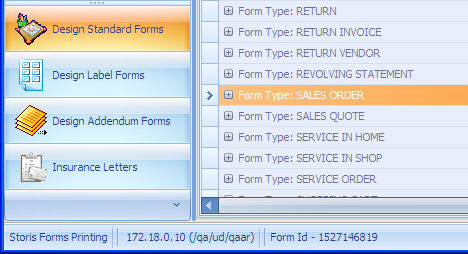
Figure 2
Right Pane
The right pane lists the form types associated with the form group you
selected in the left pane. Each form type includes one or more STORIS
Standard forms as well as any copies of standard forms your users have
made. To display the forms associated with a form type, click on
the plus sign (+) next to a form type name (see Figure 3). Information
on the selected form appears in the various columns.
To activate a form, check the box in the Default column. STORIS
recognizes only the default form for each form type, indicated by a check
in the Default column, unless locations have been specified for selected
forms (see the section on the Locations
column). You can specify a new default form at any time. STORIS
Standard Forms are indicated by a check mark in the STORIS Standard column.
You cannot edit these forms, but you can copy them and edit the copies.

Figure 3
Left Pane
Use the left pane to specify the form group whose form types (see Figure
2) you want to edit. When you click on a form group in the left pane,
the form types associated with that form group appear in the right pane.
You can choose from the following form groups:
Design
Standard Forms - includes print
forms for most of STORIS' main features
Design
Label Forms - a label form designer
similar to Label Matrix®
Design
Addendum Forms - includes forms
for import purchase order addenda
Insurance
Letters - forms for printing insurance
acceptance and insurance cancellation letters
The left pane also contains the following editing options (see Figure
1) for form types in the selected form group: