The left pane of the Update Product Images (Image Wizard) screen contains the Product/Web Collection/Product Family Grid and the Image View just below the grid.
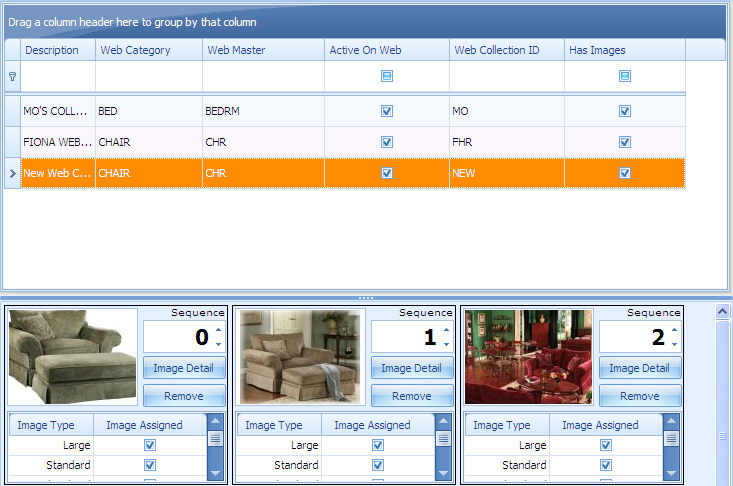
The Product/Web Collection/Product Family Grid
The first time you enter the Update Product Images routine, the system downloads all products from the STORIS Product database. Thereafter, you can manipulate the product list much like you can manipulate report data in the Personal Report Viewer (PRV). You can also switch the grid display to the Web Collection View or Product Family View using top pane options. When you close the application, the system saves the contents of the left pane and reloads it the next time you open the application. You can manually refresh the database listing by clicking the Refresh List button in the top pane.
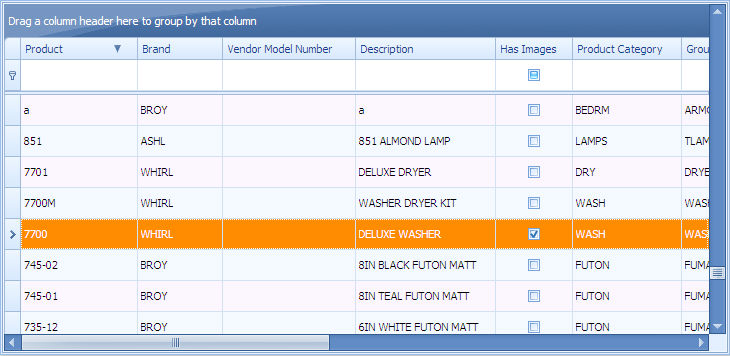
The grid displays data appropriate for the view - product, collection, or family.
A check in the Active on Web box indicates that the product/collection/family is available on the web.
A check in the Has Images box on the grid row indicates an image exists for that product or collection or family. If you click on a row, the images for the selected product/collection/family appear in the Image View section below the grid.
You can group (sort) the products/collections/families in the left pane by dragging the column heading to the top area above the headings, or filter selections by typing into the areas below each column heading.
You can filter your product view by any field. For example, to see service parts or bulk inventory, you can filter the view of the products by one of those columns of data. Not all of them will be visible - some are scrolled off the screen.
For more information on these features, see the section called Using the Personal Report Viewer in the topic called Personal Report Viewer (PRV).
The image view displays in the lower left pane, just below the grid. A thumbnail image of each image attached to the product or collection selected in the grid is displayed, along with the image sequence number, image types assigned, an Image Detail button and a Remove button.
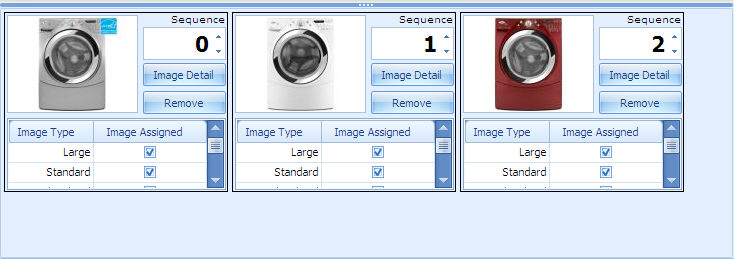
Image Sequence Number - Displays current sequence number for image and can be edited using the up and down arrows. Once a change has been made, you click the Update Image Sequences button in the top pane to re-order the image sequences. When viewing attached images from the Product field in STORIS, only the primary (sequence 0) image is displayed.
Image Detail - To view the Large, Standard, and Thumbnail versions of the image, click this button.
Remove - To remove the image from the selected product/collection, click this button. A verification message prompts you to confirm removal of the image. You cannot remove the primary image (sequence 0) if other images are attached to the selected product/collection.
Image Type, Image Assigned - A check box in the Image Assigned column indicates the Image Types (Large, Standard, Thumbnail) present for that image.
Replace an Image - With the File Explorer tab active in the right pane, you can drag an image file from the right and drop it on top of the thumbnail image to be replaced in the Image View on the left. A verification messages asks if you want to overwrite the existing image.
![]()